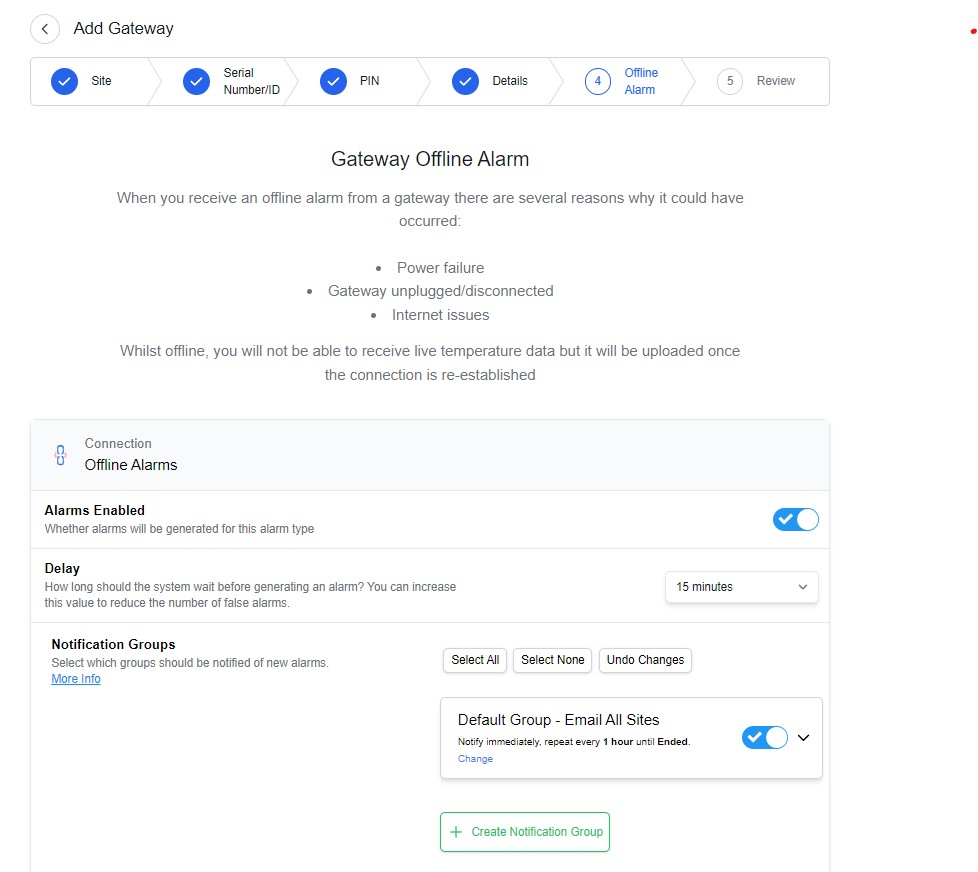
Getting Started

Configuring Clever Logger

Using Clever Logger

Common Problems

Adding a Clever Logger gateway

Adding your new Clever Logger Gateway to your account is the first step to getting online.
clever-logger-gateway-add

Step 0

Turn on the gateway

At some stage you will need to plug in the gateway and turn it on. You may as well do it straight away.

 If you are going to connect it directly to your network, also do this now. 

Step 1

Open the gateways screen

Clever-Logger-Menu-Gateways

Go to the Clever Logger dashboard

Click on Gateways in the menu.

Step 2

Add a gateway

Add Gateway Button

 Click on the Add a Gateway button in the top right corner.

Step 3

Select the type of gateway

Clever Logger Add Gateway Selection

Select the type of gateway that you have.


Note: It doesn’t matter if you select the wrong type. This initial selection is to help with product photos to step you through the next step. 

Step 4

Select the site

Clever Logger Add Gateway Site Selection

If you have multiple sites, the next step is to select the site at which the gateway will be placed.

For more information on why you would have multiple sites and how to manage them, click on the button. 


Step 5

Identify the gateway

You will be asked for the ID and PIN for the gateway. This can be found on a sticker under the gateway.

Note that the image shown is based upon the type of gateway you selected in the prior step. Once you enter the ID, the rest of the installation will automatically adjust to correct type of gateway.


If a warning appears saything that the gateway is linked to another site or organisation,  it means that it has been previously been linked and not 

Your ID and PIN are on a sticker on the bottom of the Gateway

The second part is to enter the PIN.

The gateway is now be linked to your account. 

Step 6

General Settings

Name

You will need to name your Gateway. This is what will be displayed on the dashboard, as well as in the alarm notifications. We strongly recommend that you put the word “gateway” in the name.

Description

This is a general text field that you can use to store additional information. We recommend that you include the location of the gateway. 

Timezone

The timezone is used to show what time the gateway went offline and back online. It will default to the timezone of the organisation and probably doens’t need adjusting.

Operating country

This is only used for Wi-Fi. It will default to the organisation’s country. 

Step 7

Alarm Settings

Offline Alarms

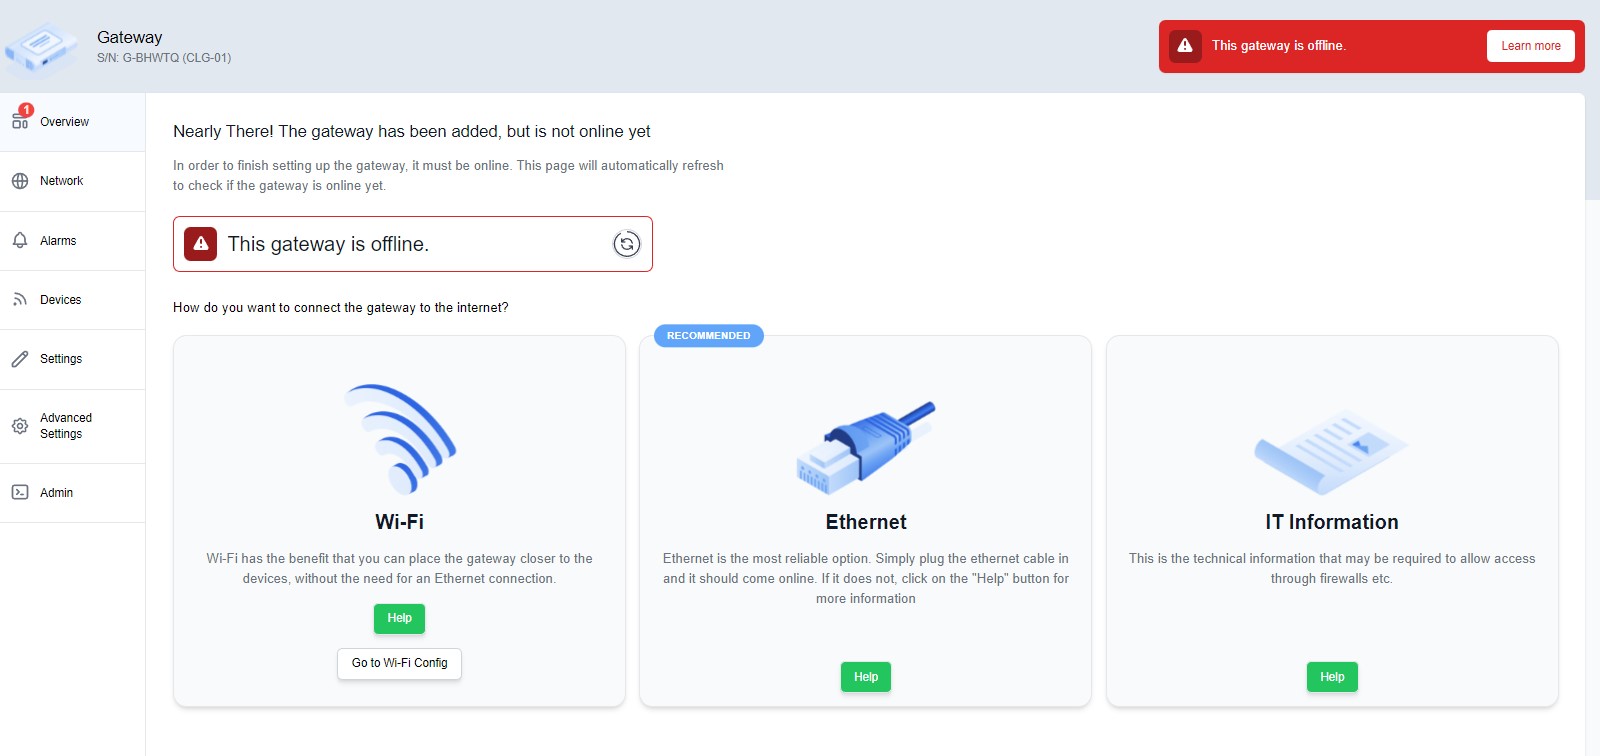
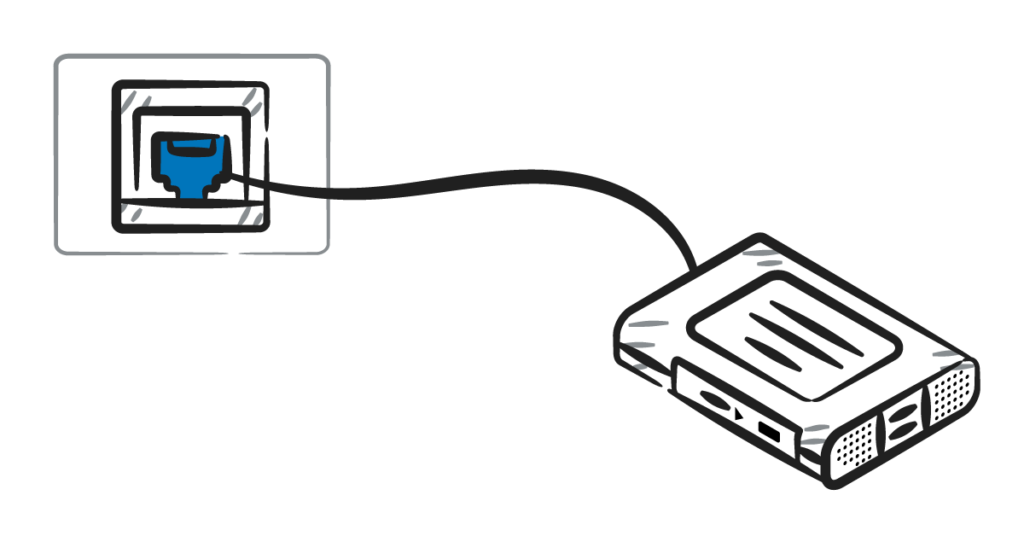
Once connected, the Gateway will be in constant contact with the Clever Logger internet server. If your power or internet fail and the contact is lost, Clever Logger can let you know.

This alarm is switched on by default and, unless you specifically don’t want to be notified about connection problems, we recommend that you leave it on.

Offline Alarm Delay

The default here is five minutes because you probably want to be notified as soon as possible if the power is out. However, if your power or internet regularly suffers from short breaks, you may want to choose a longer delay so that you get fewer alarms.

Offline Notification Groups

This is the list of people who will receive a notification if the Gateway goes offline. A default group with one member (you) was set up when you first created your Organisation.


Pro Tip 1: Dodgy internet

If you know that your internet is unreliable and don’t want to be continually sent alarms, extend the offline alarm to something like 1 to 8 hours. It’s not perfect, but stops a lot of frustration. We do NOT recommend disabling it totally because then there could be a serious problem (e.g. someone disconnects it) and you will never know about it.

Pro Tip 2: Managing multiple people

Notification groups allow you to determine who will receive which alarms, and how. They also allow you to send alarms to one group of people initially, and then escalate to others after a while. For more information on configuring notification groups and alarms, click the button below:

Step 8

Review and submit

The next step is to simply review the settings, and press “Submit”.


Step 0

Turn on the gateway

By now, if you haven’t already connected your gateway to power, do so now.  If you are going to connect it directly to your network, then do so now. 

Step 10

Get the gateway online

NOTE: You may not see this screen

If the gateway had already been turned on and connected to the network, it will bypass this screen.


You now need to decide how you want the gateway to connect to your network.  Select the appropriate help topic to continue:


If the gateway still doesn’t come online then you may also find this information useful:

30-DAY FREE TRIAL

You're going to love Clever Logger

To prove it, we’ll send you a Starter Kit to try out for a whole month.

Set it up, have a play, explore the features – obligation free.

If you love it, just let us know.

If not, just send it back.

Other "How To" articles

Frequently Asked Questions