Easy to use temperature data logger - logo

Creating a scheduled report

SEE ALL TOPICS
CLOSE
The Guide logo
Your Account

ON THIS PAGE

Recurring Reports

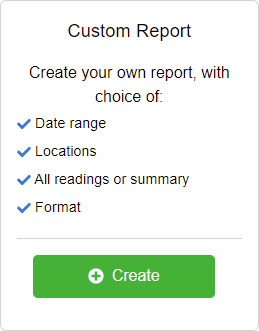
Clever Logger reporting engine allows you to either create a report immediately, or have a report automatically sent to you periodically. The process is almost identical and this article covers the creation of a recurring report.

This is useful for where you have daily, weekly or monthly reporting requirements. The required information will be automatically emailed to you and you do not have to login into the Clever Logger system.

Ironically many people just create an email rule to then move the email into a folder so they don’t have to look at it. They tick the box of “we have the report” without having to actually look at it. 

Step 1 Icon

Select the report type

This determines the type and amount of data that will be shown on the report:

A simple report showing the daily minimum and maximum temperatures.

This is an “industry standard” because you can see that something complied in a very small number of lines. 

Personally we think it is too limited because if there is a problem you then have to run a second report to see what actually happened.

That’s why we invented the “min-max + extremes report”.

Min-Max

RECOMMENDED

The daily minimum and maximum plus a list of any out of range temperatures. 

For example, you will see something like:
15/2       3.5°       12.2°
          11:35AM       9.2°
          11:40AM      10.3°
          11:45AM       12.2°
          11:50AM       8.3°

This has the benefit that the report is very compact when all is fine, and detailed when there is a possible problem.

Min-Max + Extremes

All readings taken during the period.

This is a great report for when you need ALL the data for something like research, but we do not recommend it for most users. It can easily become as long as “War and Peace”, but without the excitement.

All Readings

Step 2 Icon

Select the locations

If you have more than one location, you can choose which you would like included on the report.

To add a location to the report, tick its box.

Step 3 Icon

Select the report format

The PDF format is the most useful option. It can be easily viewed on all computers and mobile devices. It can be printed on a standard piece of paper. It can also be easily shared with others. 

PDF Format

XLSX Is the native Microsoft Excel format. This will create an editable spreadsheet of values. This particularly useful if you need to sort or edit data. You will probably only use this with the All Readings report type.

Excel Format

If in doubt, go with PDF.

Step 4 Icon

Give the report a name

Anything you like up to 25 characters. e.g. Vaccine Fridge Report

Step 5 Icon

Select how often the report should be sent

Every Day

Reports will be sent at the time you specify every day.

Daily Min/Max reports will show the minimum and maximum temperatures for each hour. 

e.g.

HOURMINMAX
7am to 8am3.56.1
8am to 9am3.26.4
Every Week

Weekly Min/Max reports will show the minimum and maximum temperatures for each day.

Reports will be generated at midnight of the weekday you select.

e.g. If you choose to generate the report on Monday it will generate and send at the midnight between Sunday and Monday.

e.g.

DAYMINMAX
Monday3.56.1


Every Month

Reports will be generated and sent on the 1st of every month.

Monthly Min/Max reports will show the minimum and maximum temperatures for each day.

e.g.

DAYMINMAX
Monday3.56.1
Step 6 Icon

Select time zone

By default, this will be the time zone you are in.

Step 7 Icon

Select email recipients

You can choose to email the report to any of the users in your site.

Note: You can only send reports to users of Clever Logger, that is, people who have been invited and have accepted the invitation. This is to reduce the chance of the email being blocked as spam.

And that's it.

You will receive your report every day/week/month, straight to your inbox.

The report has a different subject line, depending on whether there were any alarms during the report period. This makes it easy to sort your emails into different folders

30-DAY FREE TRIAL

You're going to love Clever Logger

To prove it, we’ll send you a Starter Kit to try out for a whole month.

Set it up, have a play, explore the features – obligation free.

If you love it, just let us know.

If not, just send it back.

What is NATA?

The National Association of Testing Authorities (NATA) is the recognised national accreditation authority for analytical laboratories and testing service providers in Australia. It is an independent, not-for-profit organisation that provides independent assurance of technical competence. 

NATA accredits organisations to perform testing and inspection activities for their products and services. This gives consumers the assurance they need to make safe, healthy and reliable choices .

Location Views

In the top right corner of the Location page, you will find the View chooser.

There are three options: Simple, Detailed and Gauge.

change-location-view

Other "How To" articles

Frequently Asked Questions